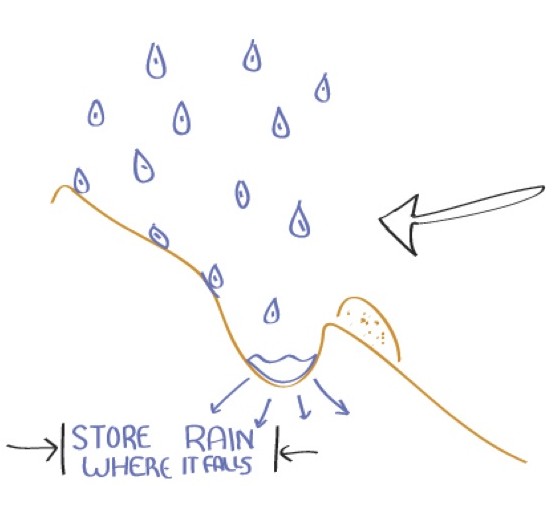
Principle: Store rainwater in the soil and provide access to the site
A permaculture community’s foundational structures are its earthworks and these are one of the first areas to consider when designing your site. Typically earthworks are thought of as swales, irrigation channels, or footpaths. However, they are much broader: think of earthworks as shaping the entire landscape of an area to maximize water retention and minimize erosion.
In permaculture, the primary goal of most earthworks is to store rainwater in the land, as close to where it falls as possible. By doing it correctly, you can diversify the landscape for food production (fish culture ponds, swales for food forests) or soil rehabilitation (swales, banana circles).
Earthworks are typically labor-intensive up front. But they return benefits over many years by creating permanent features in a landscape, which help harvest water, grow crops, and define where you live and cook.
Designing Earthworks
It is best to consider many aspects of the earth-moving process before doing any digging. Consider the following aspects of your design as you dig:
- Design – First, decide where you would like to place a swale, terrace, road, dam or drain, indicate the location on a contour or topographic map,
- Soil test – Then test the soil to see if its composition is suited to your purposes,
- Micro-contours – Scrape back “leaf litter” to expose the micro-contours of the land,
- Contours of the land – Using an A-frame, water level or laser and transit levels, “peg out” the site to indicate actual variations in elevation.
Remember – It’s never perfect, it’s always an estimation. Just evaluate, decide and go with it. You’ll learn something from the experience.
Contour Lines
Well-constructed earthworks begin with an accurate understanding of a site’s topography. Contour lines are the building blocks for your site’s topographic map. They connect points of equal height of a landscape on a map. The proximity of the lines indicate the change in elevation on a landscape, which determine how and where water will flow. The closer the lines are together, the steeper the elevation.
Keyline design
Keyline is a design strategy to identify appropriate dam and swale placement along natural contours of a valley. The key point of a valley is the point where the land changes from convex to concave. Place dams along this point. A contour line from this point going in both directions within the valley is the keyline of the valley. Channel all swales away from the key point.
Proper keyline implementation allows for rainwater harvesting and gravity-powered irrigation systems. Keyline design also allows soil to be compacted rather than erosion in heavy rain.
Methods of leveling
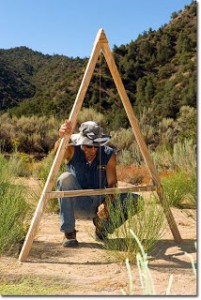
A-frame – To make an A-frame level, tack three pieces of wood into an “A” shape that is approx. 2m tall and hang a weight from the top corner. Place it on relatively level ground and mark where the hanging weight falls on the crossbar. Flip the two sides around 180 degrees and mark the plumb line again. The center of these two lines marks is the middle line.
When measuring contour lines, place the two other corners on the ground you want to check if level. If the weight hangs in the middle, the two ends are level.
Water level – A water level is a clear hose filled with water. It works off of the principle that water always levels out to the same place in a closed container. Place each end of the hose where you want to check if level. The water level will show if the two points are level.
Transit level – A transit level is a tripod and a stick with a measuring tape attached to it. First level the tripod. Then move the stick to two ends where you want to check if level. If you read the same number on the measuring stick, the two points are level.
Laser level – A laser level is a more expensive transit level that dings when the measuring stick is in line with the laser.
Earthworks elements
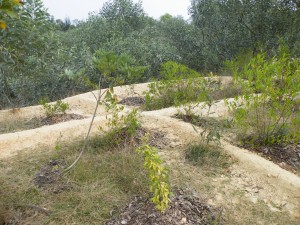
Swales
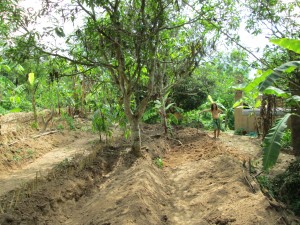
Swales catch water from an incline and allow it to soak back into the ground. Swales can significantly raise the water table in an area and are a great source of water storage for trees and vegetation. Tree and vegetation roots will grow toward the water table and take ] hold of the soil. Swales can be level or 1-5% off contour to channel water down the slope to collect in a pond or another type of catchment system.
Swales play an important role in establishing vegetation. To determine how big and how close together to dig them, you consider the slope and layout of the land as well as its purpose. If you want a dense forest or a sunken garden trench, you can dig swales about a 30cm deep / 15cm wide and allow a meter between each swale, for example. Or if you’re looking for more broad scale erosion control, you can dig bigger swales (1m deep / 1-2m wide) leaving 10-50 meters of space between each swale. It’s difficult to determine the best spacing between swales – it depends on the slope of the land, the infiltration rate of the soil and generally what you want to do.
There is also a swale calculator online found here – http://extension.oregonstate.edu/watershed/sites/default/files/RainCalc/raingarden2.html . This calculator can tell you how far apart and how deep you should make your swales depending on the slope of the land and infiltration rate of the soil.
Net and Pan swales
Net and Pan swales are swales designed to catch water across an entire slope of a land. The “net” acts like a fish net, catching all of the water along the contour. The “pan” is the basin dug every few meters to catch water and store it in the ground. Planting trees in the pan provides a great source of water for trees.

Fish scale swale
A fish scale swale is an arc of dirt cut out around the base of a single tree. This swale will be filled with thick branches and mulch, enough to completely cover the ditch. When it rains, water collects in the swale and provides water for the tree and allows the branches to slowly decompose. This type of swale works for those who don’t want a yard with “ripples” yet still want the benefit of swale systems.
There is a logical explanation on whether you should dig the swale above or below a tree. If you dig it above the tree, water will seep directly into the roots. But then if you dig the swale below the tree, water will seep into the ground and allow the roots to grow toward a source of water. Either way, when you dig a fish scale swale, you are allowing the land to absorb rainwater near the roots of a tree.
Bund
Bunds are small raised mounds. Imagine an inverted swale. Bunds are good for creating footpaths along the ridge of a garden bed. This will retain water in the garden and create a place to walk.
Terraces
Terraces are used more for planting on a slope than rainwater catchment. Terraces are flat whereas swales are more curved. Terraces create stable and productive systems. For best results, keep less than an 18% slope on each terrace. 1m is a good depth of a terrace. This allows enough space to plant some trees, some crops and leave enough space for a small path. However, the size can vary.
Drainage ditches
Drainage ditches are gently sloping water channels that flow through a property. They are used to channel water from one place to another. You want them to be steep enough to flow, but not cause too much erosion. Drainage ditches placed on the uphill side of roads are great for channeling water away from a road.
Gabions
Gabions are big piles of rocks (at least 1m3) wrapped in a chain link fence or other available non-organic materials. Gabions are used for erosion control on steep slopes.
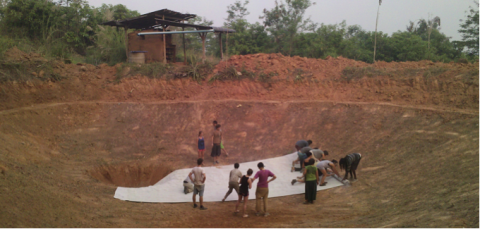
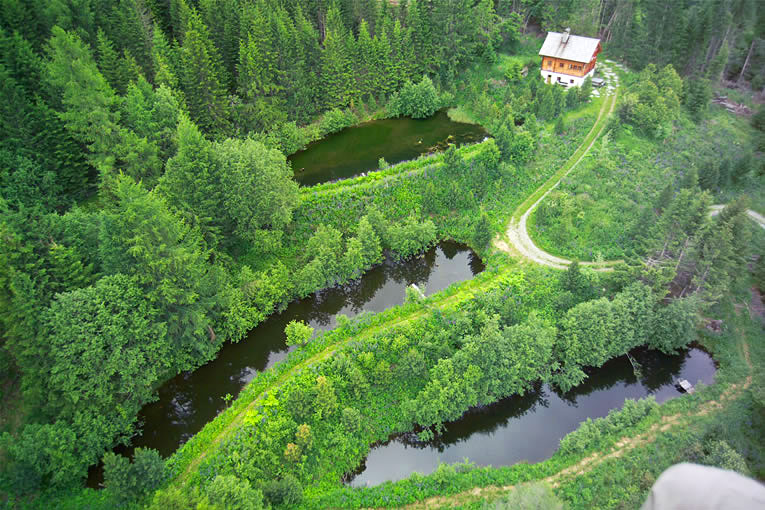
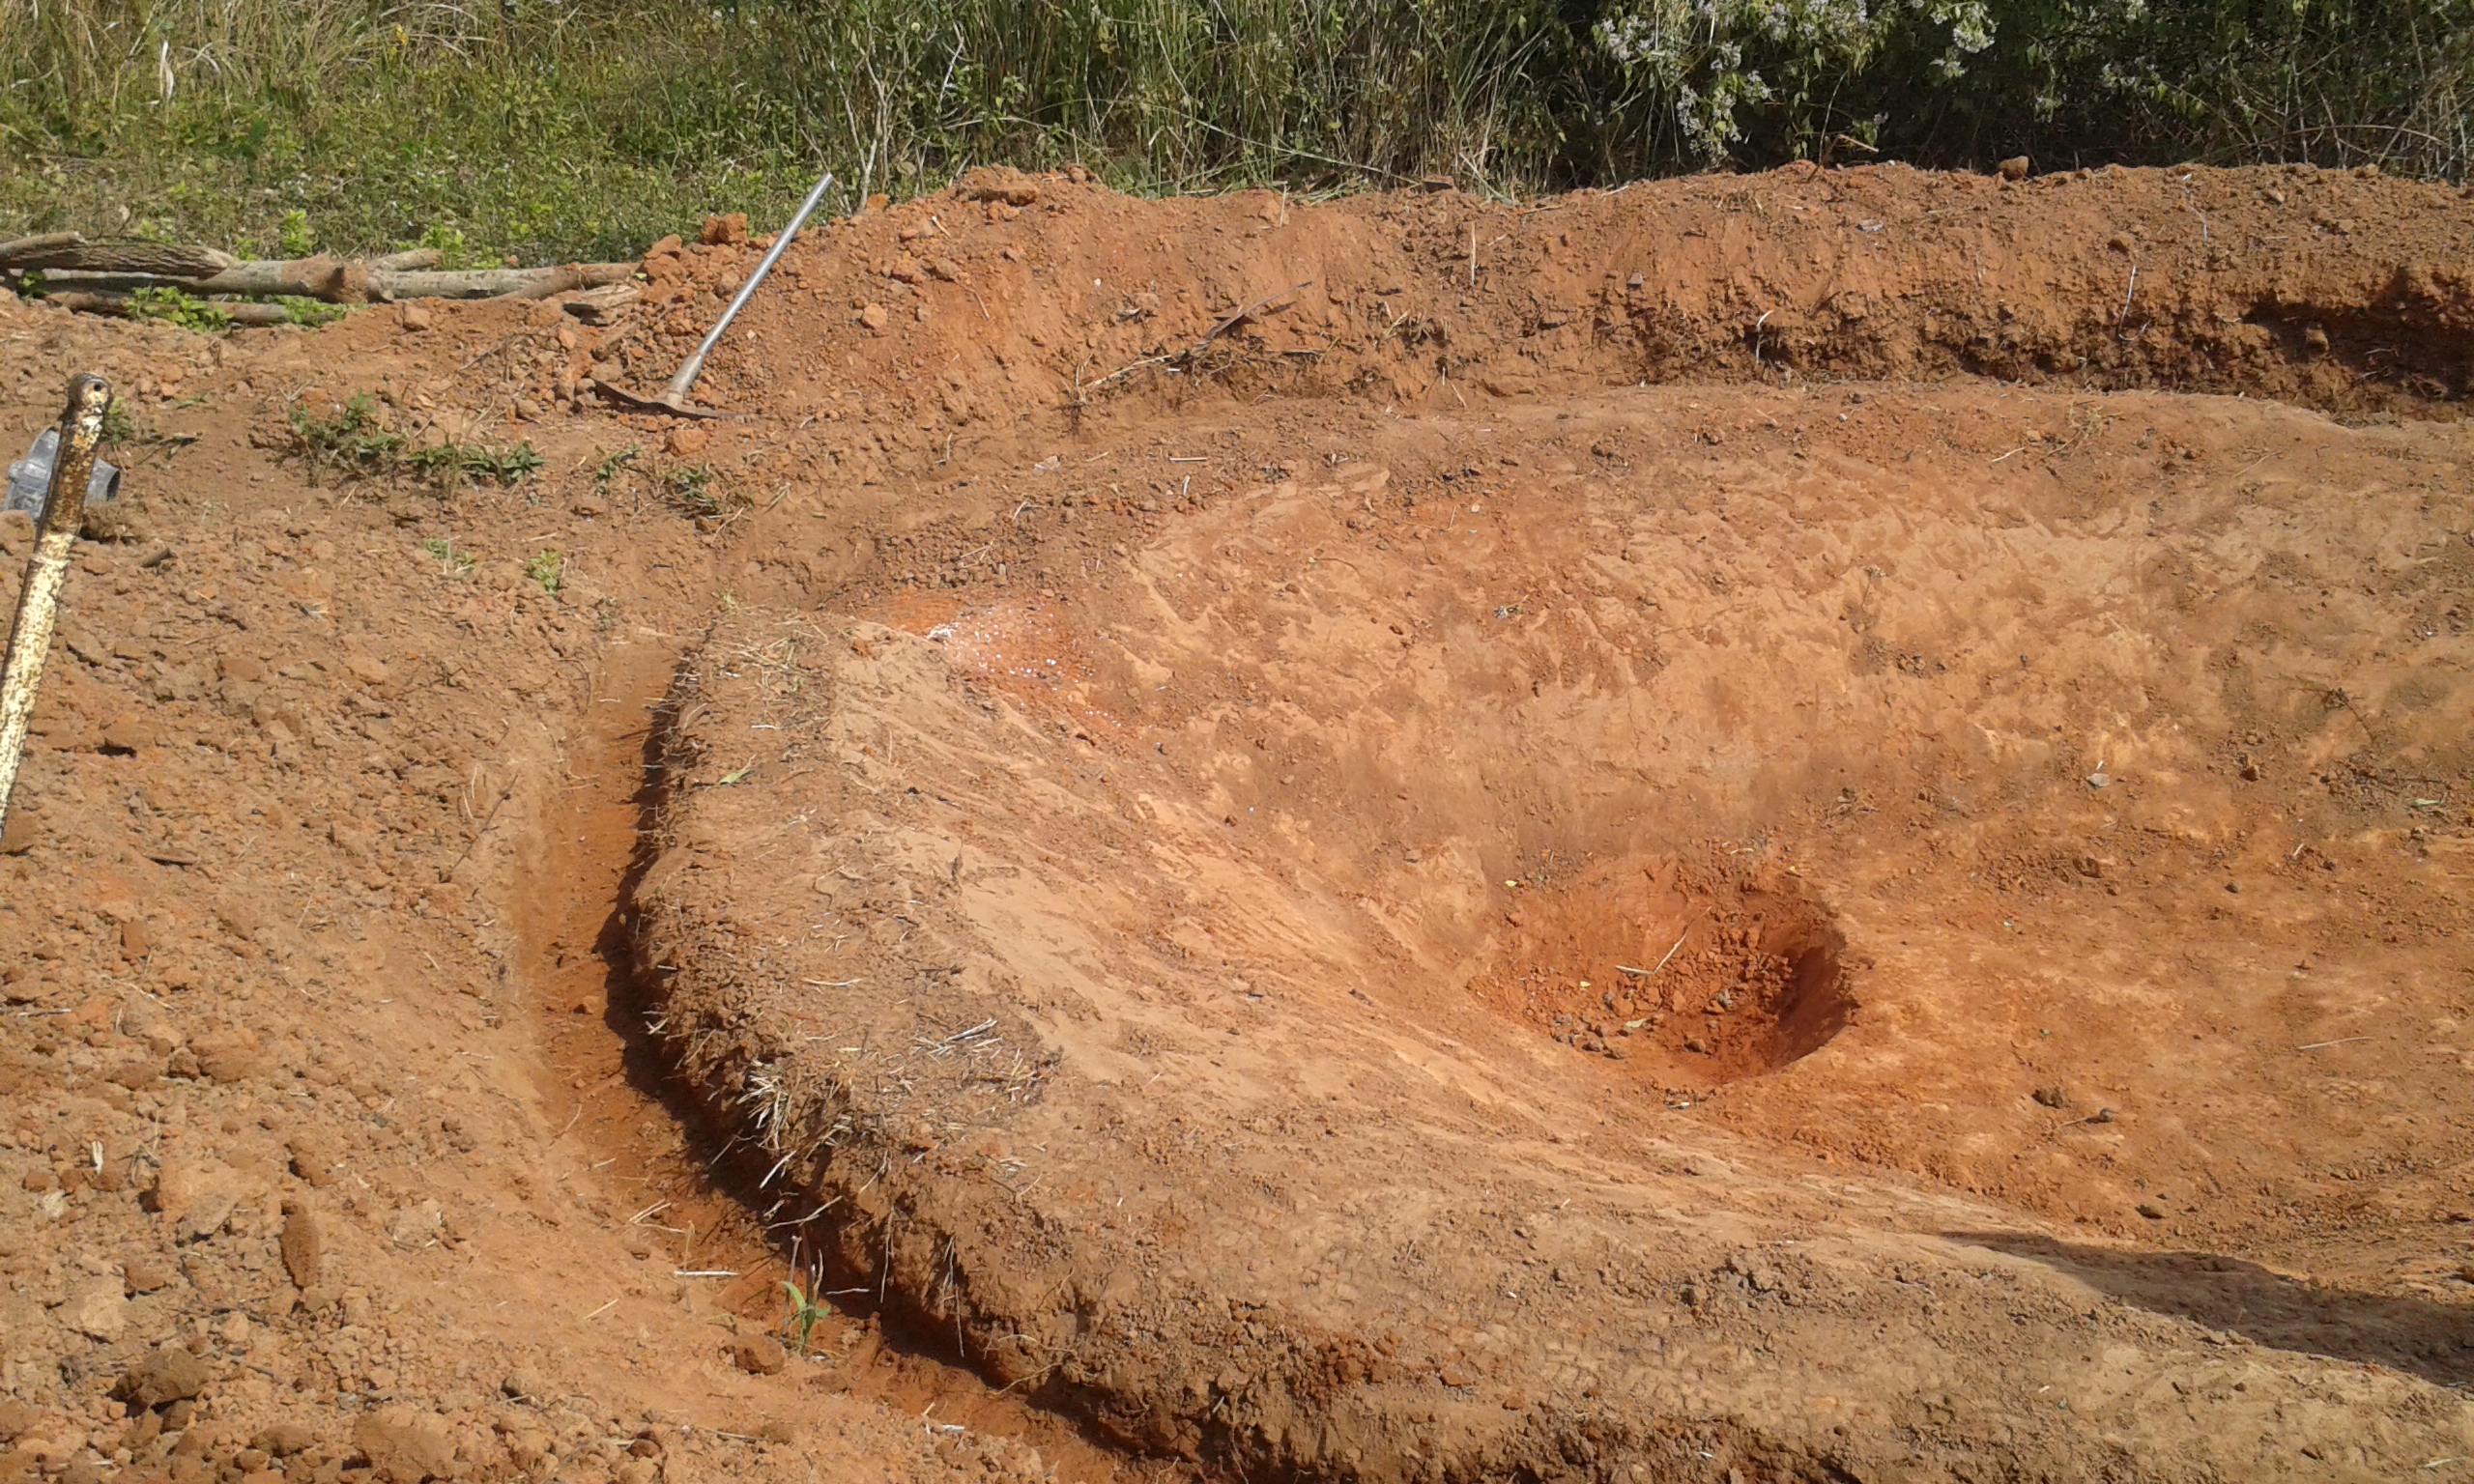
Ponds
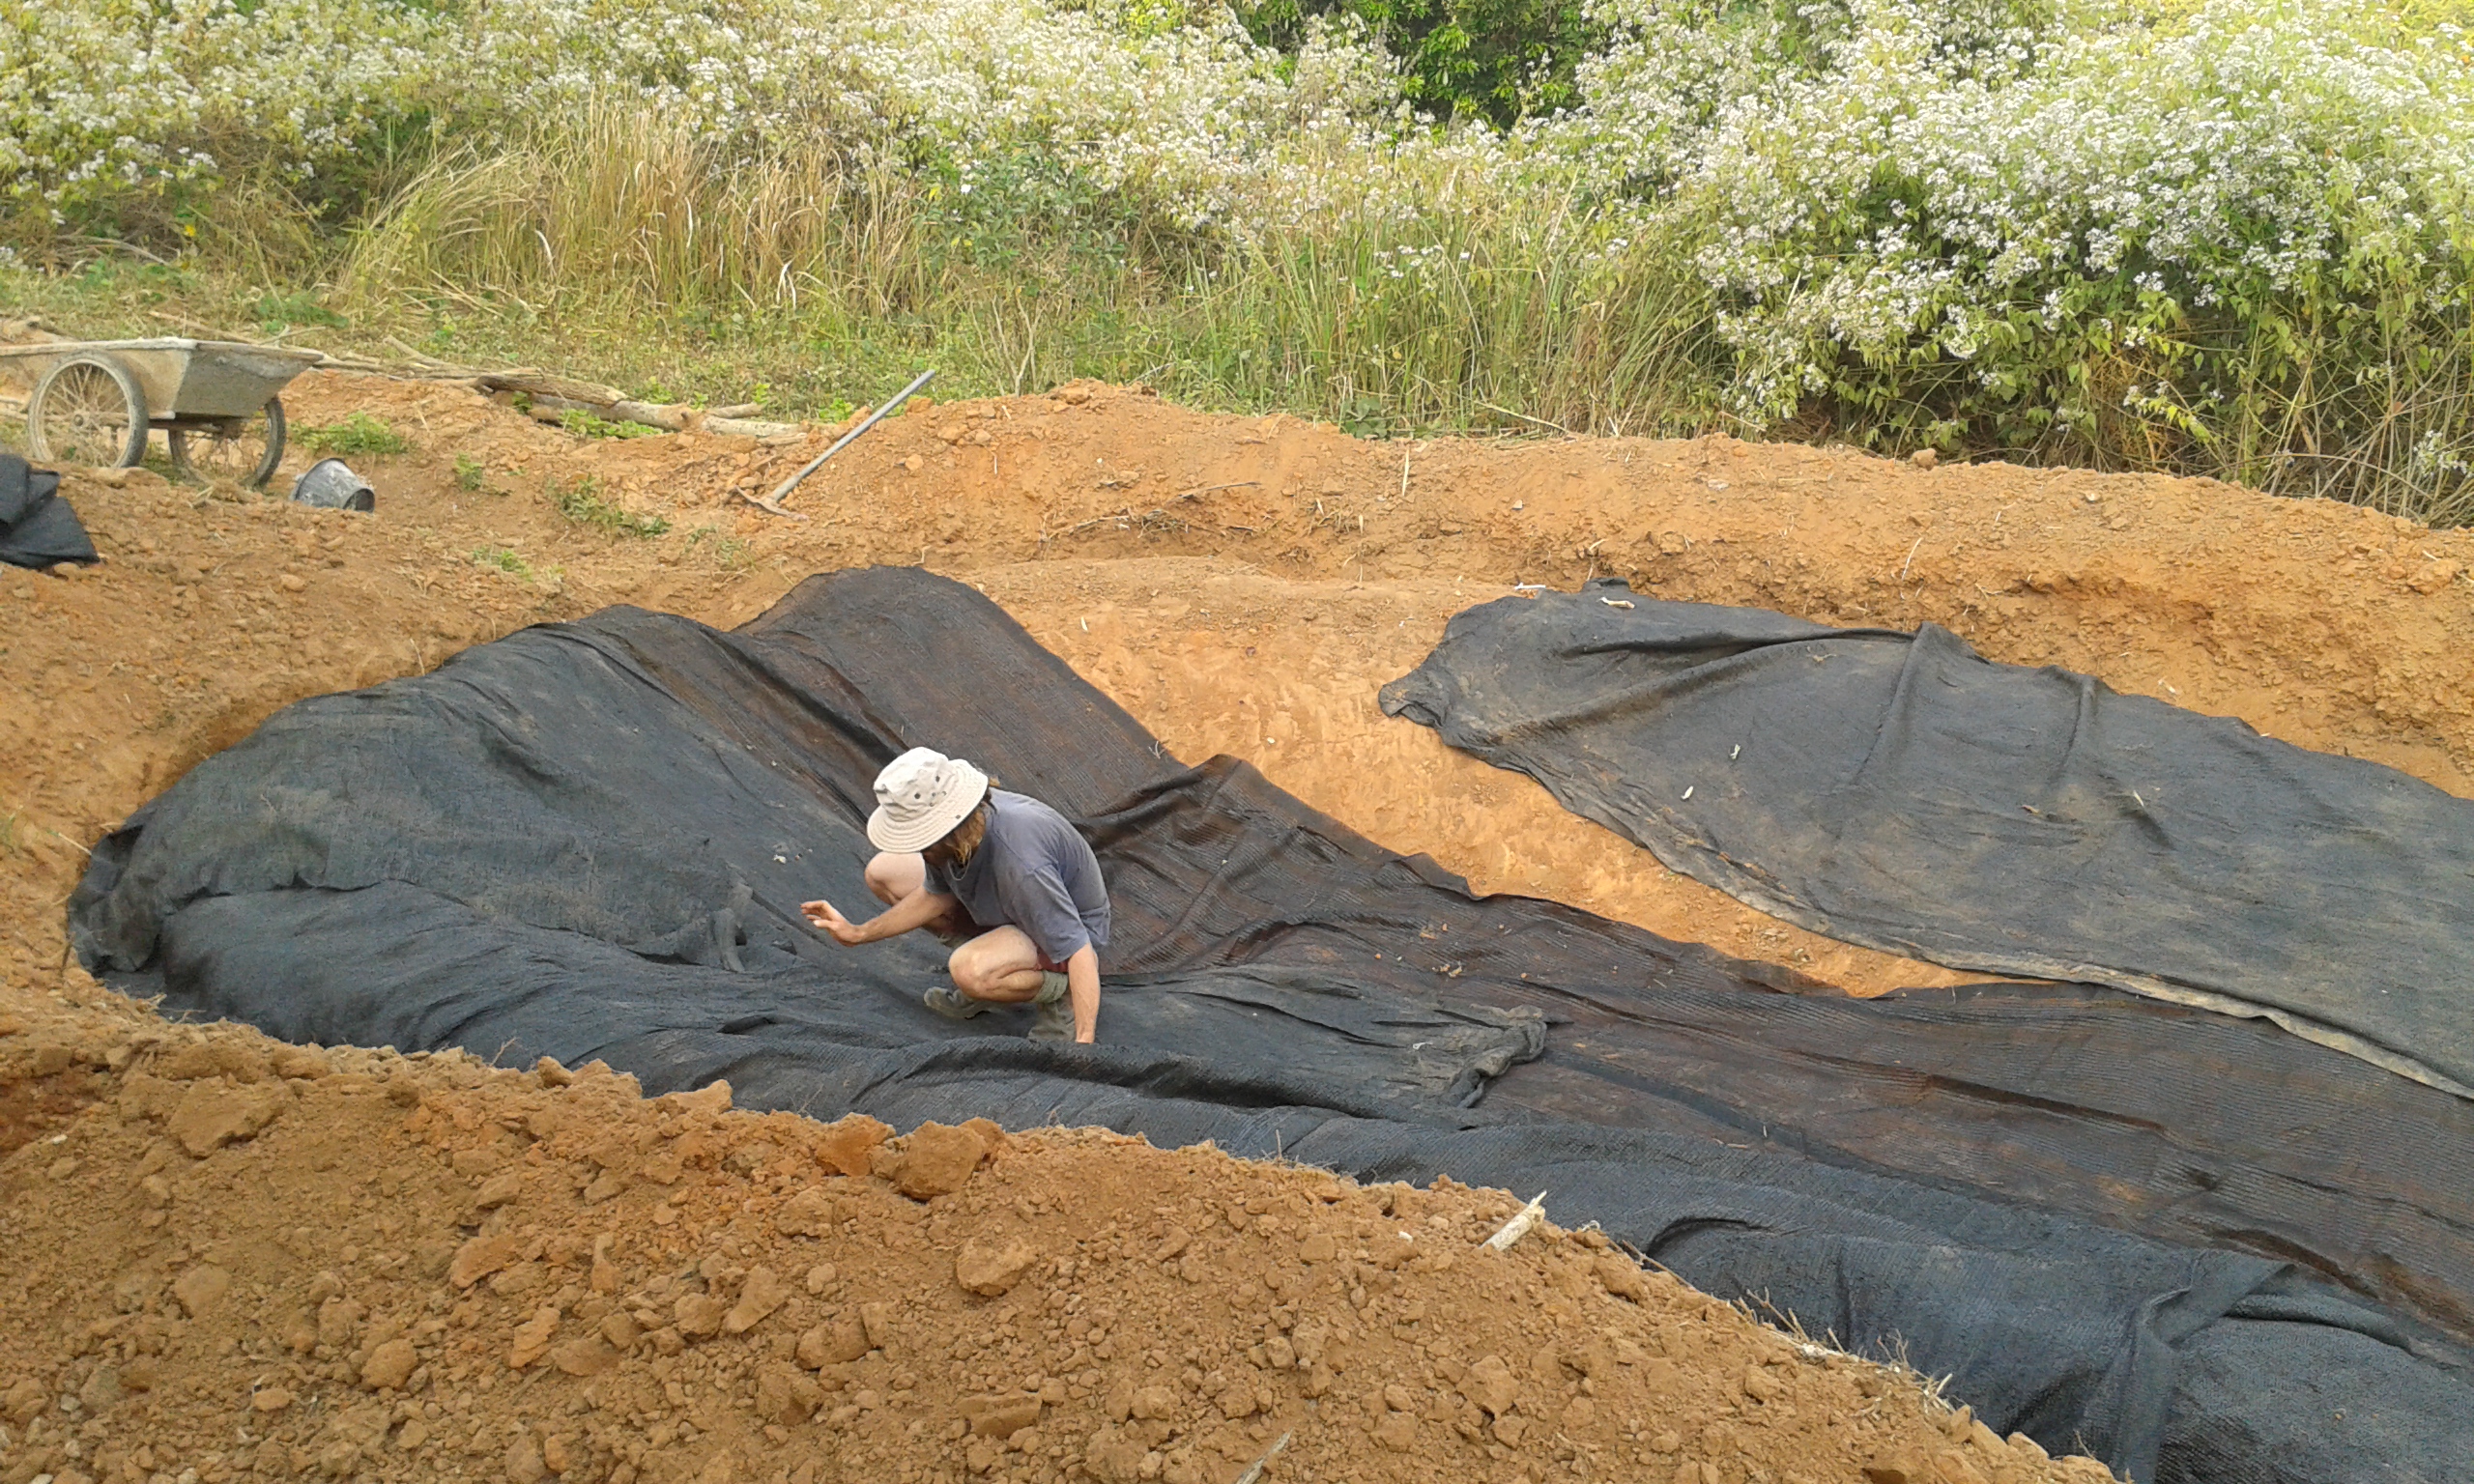
Ponds are the cheapest and easiest way to store water for later use – especially if they are located somewhere that allows you to use gravity to transport the water. There are several ways to build and/or line a pond. You can either have a pond be above ground, where you build impermeable walls, or below ground, where you dig a hole. Whichever you choose, it is important to line the pond so it will hold water.
Clay
This is the cheapest and most natural way to line a pond. You will need a very high percentage of clay (~70% or higher) in the soil for it to hold water. So first you’ll need to determine how much clay is in your soil. Some methods are listed in the “Soil” section of this handbook. Once you’ve determined you have a high enough percentage of clay, pound the clay with your feet, hands or tamper to compact the clay.
Sepp Holzer, a long-time permaculturist from Austria, lined a series of ponds on his site using pigs. He put pigs in his pond for a few weeks and moved the pigs around to give equal time in each area of the pond. Pigs love to roll in mud. And, in this case, it worked.
Bentonite clay liner
Bentonite clay is impermeable when wet. It is a great material to seal a poind. You can buy bentonite clay in bags and spread it by hand, layer by layer, wetting each layer as you go. Or you can buy a manufactured liner. A bentonite clay liner is a synthetic liner, which evenly disperses the clay throughout a pond bottom. These liners, rugged enough to be used in industrial sites for containing toxic liquid materials, are a long-term, somewhat natural solution for lining a pond. Dependable and relatively affordable. Look online to find a nearby distributor.
Plastic liner
Plastic liners are cheap, somewhat durable and usually easy to find. You can lay soil on top of a plastic liner (up to 30cm) to protect it from UV damage.
Ferro-cement
This is a good long-term solution for a pond liner. Ferro-cement cisterns/ tanks/ponds are durable and very flexible as far as the shape of the water system you are creating goes. However, be aware using concrete in a pond will increase the water’s alkalinity.
Here’s a good post digging ponds from PracticePermaculture.com.
Dams
A dam is a barrier that retains water and raises the level of the water body. The following descriptions can give you an overview of the kind of small, earthen dams that are common on many small farms.
Note: Designing and building dams safely can require a level of expertise beyond the scope of this handbook. You should consult more extensive reference works or a professional when building your own, especially because many countries require permits when constructing dams. Here are some good websites for dam guidelines: http://www.fao.org/docrep/012/i1531e/i1531e.pdf,
http://dpipwe.tas.gov.au/Documents/Guidelines-for-earth-fill-dams.pdf
Building a dam
Dams should have a width equal to twice the height of the dam on all sides. This maintains the integrity of the wall. A good dam must also have a keyway. A keyway is a method to lock in the dam to the earth.
An outlet, called a dam spillway, should be located about one meter below the height of the dam wall. The distance between the dam spillway and the top of the dam is called the freeboard. Never put a spillway on the front of the dam or near the keyway. Always place it on the side. Ideally the spillway should flow into a swale or some other outlet.
Once you construct the dam, it is important to seed the dam wall. Grasses like lemongrass, citronella, vetiver or napier work well to hold the bank. Don’t plant trees in the dam wall as their roots can weaken it.
Types of dams
Saddle dam – Usually the highest dam in a landscape, a saddle dam is situated on the saddle of two hills. This type of dam is useful for controlling fire and/or wildlife.
Ridge-point or horseshoe dam – This type of dam is built on sub-plateaus of flattened ridges, usually on a descending ridgeline and below a saddle dam.
Key point dam – These dams are located at the highest practical construction point in the hill profile when the gradient changes from convex to concave.
Contour dam – Walls can be built on contour wherever the slope is 8% or less, or sufficiently flat. Imagine a big swale, but with walls for more water capacity.
A few other types of dams to look up online: arch, embankment, gravity, buttress, turkey nest dam.
Paths
Establishing good path networks throughout your site will provide easy access to key areas and keep you from tip-toeing through puddles after a hard rain. Consider some of the following aspects when designing and implementing site paths.
Width
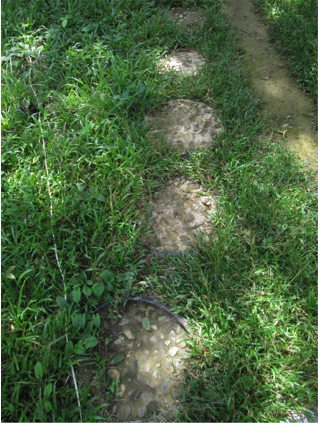
1 meter is a good enough size for a footpath. Consider 1.5 – 2m if the path will be used for carts or wheelbarrows. Also, the average human step is 65cm. If you decide to use stepping stones, place stones 65cm apart, center to center, for the most comfortable step (Barefoot Architect).
Drainage
What is the contour of the desired path location? Where will water pool when it rains? Consider digging drainage ditches on the side of the path to whisk rainwater away.
Paths on bunds – As a raised, compacted earthwork, bunds are a natural location for footpaths.
Traverses – If your path is on a hill or incline, consider building a path that zigzags up the hill. This prevents erosion and makes it easier to walk.
Bevel –The middle of a path should be the highest point, sloping away from the path on both sides. This will prevent flooding.
French drain – If you know you’ll have a problem area for flooding, dig a drain (30-50 cm deep), fill it with gravel and channel the water away from the path.
Medium
Having a good permanent medium will greatly extend the life of your paths. Gravel is a sturdy, cheap, and usually available medium for footpaths. The biggest drawback is that it’s not fun to walk on with barefeet. Consider tiles, stone pavers or pre-poured concrete pavers. At Saelao Project in Laos, volunteers filled old bicycle tires with a sheet of chicken wire, filled it with cement and placed flat stones on the surface.
Plastic barrier or cardboard – Laying a sheet of plastic or cardboard as a base layer suppresses weeds along paths. Cardboard won’t last very long, but works as a short-term solution to creating a path.
Aesthetics
Try these ideas for creating an nice-looking path:
- Grass, pinto peanut or other groundcover plants work well in between stepping-stones. Groundcovers look nice and soak up water.
- Planting trees or perennials on either side of a path allow for easy harvesting and a more pleasant walk through the site.
- Footpaths should be well-marked at key points along the path.
- Installing solar lights or other lighting helps getting around at night.
Roads
If you are looking for something more substantial than a footpath, consider building a road. Depending on the use and local permitting requirements, it may be best to consult an engineer. But if you’re in a bind or don’t have the funds, consider layering a road as follows:
- First lay rubble, large rocks or broken concrete, on the base layer. This is the foundation of your road. (10-30cm, depending on the use).
- Lay smaller rocks or gravel to fill in the gaps of the rubble.
- Compact the two layers by driving a vehicle back and forth over the first two layers. Keep filling in the gaps as the gravel settles.
- The middle of the road should be the highest point of the road. Make sure both sides slope away from the center toward the edge. This prevents pooling or erosion in heavy rains.
- Once the first layers are tightly compacted, fill in the road with dirt or clay. Continue compacting. Maintain the slope. Monitor the road over time.